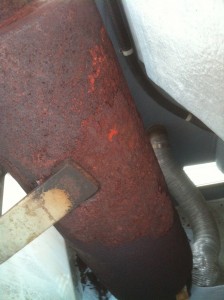
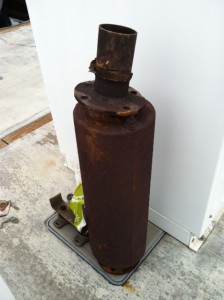
…continued from the Exhaust Wrap and Exhaust Leak (and Muffler) post. Here is what the muffler looked like when we took the exhaust wrap off:
Eric wanted to replace the old muffler with a stainless steel one. He contacted Nordhavn to see if the same muffler was made in stainless steel. It was, however, it was $1,400 vs $400 for the carbon steel version. But the bad news was that, while it wouldn’t rust as quickly as the carbon steel one, the stainless steel one was still prone to rusting, too. Hmmm… that didn’t sound good.
Eric talked to a few people and found out that there were a variety of coatings available that will deter/prevent rust. He was told one coating in particular, called a thermal barrier coating (AKA Header Coating/Exhaust Coating) was supposed to be the most corrosion resistant coating on the market. It combined the high temperature characteristics of ceramics with metallic frits to withstand metal temperatures in excess of 1300 degrees Fahrenheit, with a chrome-like appearance that will not rust. And it was only $200 to apply it.
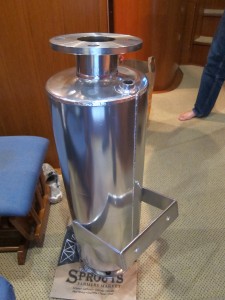
Eric decided that the carbon steel muffler with the thermal barrier coating was the best plan and went ahead and ordered the muffler through Nordhavn. Our muffler was held in place with a special, custom made mounting bracket. Once the muffler arrived, Nordhavn arranged for a company called Prime Fabrication to make the bracket and weld it onto the muffler. When the bracket was attached, it was sent to Olympic Coatings to put the thermal barrier coating over the entire thing.
Eric picked the completed muffler up from Olympic on a Monday morning in November 2012.
He was eager to have it installed right away. We had promised to do a funeral service and burial at sea aboard Kosmos that upcoming Friday morning, and he wanted the new muffler in before the outing. Christi was hesitant. What if something went wrong? She thought it would be prudent to wait a week before installing it. But Eric assured her the installation would be no big deal and we’d have no issues preventing us from doing the funeral service. Famous last words.
Bob Allen, the mechanic who did the work, wrote this about removing the muffler:
Nordhavn’s dry stack exhaust system is similar to a conventional truck exhaust design in that it routes engine exhaust vertically to be vented far above the vessel. The stack is adjacent to (and affixed to) a mast.
Also similar to a truck-type vehicle, the Nordhavn utilizes a muffler to quiet its exhaust note. On a Nordhavn 43, this component is located in its own cavity, above the uppermost deck, behind the pilot house. Some brief research revealed that the muffler Nordhavn installed was indeed a truck muffler for diesel exhaust that was adapted for marine application. Once the factory installed thermal blanket was removed, however, it appeared the marine preparation was minimal.
Excavating the muffler for replacement required the removal of eight bolts, four from each flange and two nuts from a dampened bracket laterally fixing the assembly to the pilot house bulkhead. Unfortunately, the eight bolts couldn’t be more seized if they were welded in place. This was as a result of thousands of hours of heating the muffler materials to 400+ degrees Fahrenheit, cooling to ambient, then heating again. The salty environment also furthered the corrosion.
After preparing the removal with what seemed like gallons of penetrating fluid, only one out of the eight 1 1/8” nuts proved removable with a conventional tool – a box-end hand wrench. After adding a foot of pipe for leverage, hammering the wrench ends and banging fingers, it was decided to transition to power tools.
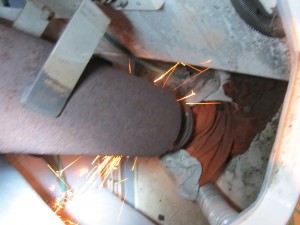
First, a 7 amp Makita 4.5” grinder with a 1/8” cut-off wheel was employed. Protected by gloves and eyewear, one upper flange nut was shaved off. It took only a few steady-handed minutes. While cutting the second nut, the cut-off wheel, which shrank as it wore down, jammed and shattered itself, as well as stripped the internal gears of the grinder and wedged the axel lock so tight that the cutting wheel could not be removed. A trip was taken to the tool store where the Makita was replaced with DeWalt 11 amp model (which was twice the Makita’s price).
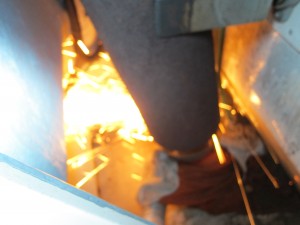
Returning to the scene of the battle, the DeWalt began cutting away the balance of the nuts, while also generating four times the sparks (and rust creating particles galore).
Once all eight nuts were lying smoldering on dampened rags, it was obvious the major part of the job still lay ahead. Once again, penetrating oil and hand tools were applied to what was left of the fasteners. The first two bolts were removed without drilling, but it was clear from the sore and near fractured fingers that the rest could not be removed without electricity driven horsepower.
First, we decided to attempt drilling out the bolts. Each of these bolts displace ¾” of hard steel. We began with 1/8” bits and worked up 1/8” at a time to 3/8” then added ¼” of diameter as bigger and bigger bits cleared our metal. Fastening bolts require a very hard drill bit material, so we were using carbide bits. Extra care had to be taken to keep the tool cool, straight and perpendicular to the work because if a bit catches in the hole it’s creating, a powerful drill can suddenly rotate, injuring the operator’s hands.
Upon finishing a ½” hole, the third bolt began to move and came out after some back-and-forth with the wrench and hammer. One more bolt also became dislodged after drilling a sizable hole. Now all bolts were removed in the upper flange and it parted from the muffler.
The bottom flange was worse. Due to the deterioration, the metal consistency within the bolt steel was flawed. Bits kept binding and several broke, requiring excavation of the bit remains before proceeding.
Part of the difficulty stemmed from the need to drill at an angle to accommodate the muffler diameter. Given the rusty condition of the muffler and the fact that it was free at the top, we decided to try to sever the unit near the base flange by bending it side to side while twisting it using the lateral bracket. Although the unit wouldn’t sever, we were able to bend it enough to facilitate an improved approach for drilling.
After an hour was consumed removing one bolt, the grinder and cutting wheel was re-employed to aid in the process. If part of the muffler flange could be breached from the circumference of the bolt, pressure could be relieved allowing the bolt to be removed with a punch. Care had to be taken not to nick or cut the mating exhaust tube flange. Another couple of hours of grinding, sparks and pounding (swinging a 1.5 lb. ball peen hammer) resulted in another liberated bolt.
Frustration building, we took a break from the sparks and heat. When we attacked the muffler again, we tried to savagely sever the bulk of the unit from its base. After more bending, twisting and pulling — Walla, the rusty innards finally broke enough to liberate 90% of the deteriorated hulk.
Before us lay a perfectly exposed flange pair with only two more bolts to remove. More grinding, more hammering, a few more whacks on the hand, and the remaining fasteners yielded and the balance of the muffler was removed. Exhaust stack flanges were unscathed.
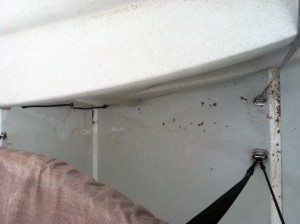
By the time the muffler was fully removed, the entire top deck was covered in rust particles.
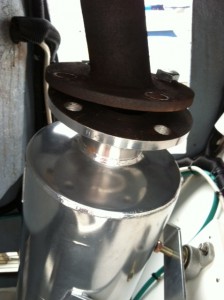
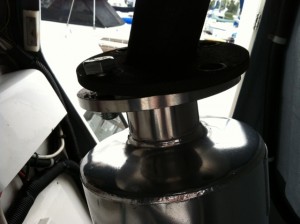
We removed the old gaskets, sanded the flange surfaces smooth and were prepared to install the shiny, new replacement. Upon an initial dry fit of the replacement muffler, neither flange aligned with its mate, but that story will be covered in another post.

Suggest using anti-seize lubricant on the new bolts, Permatex 133A or equiv.